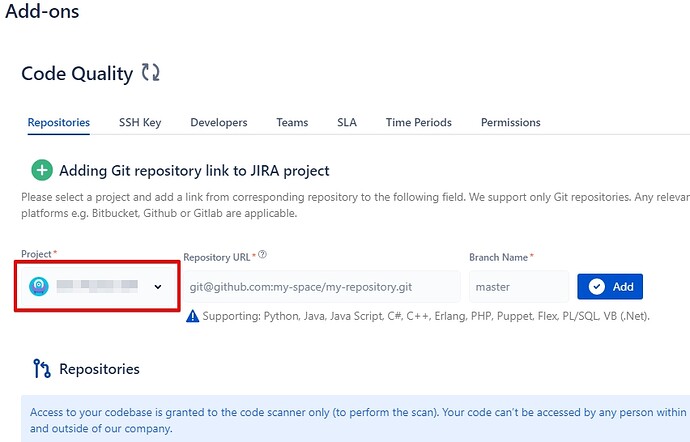
The repository can be added to any Jira project in “Repositories” tab in the add-on settings*.
- Select project related to the repository in the “Project” drop-down.
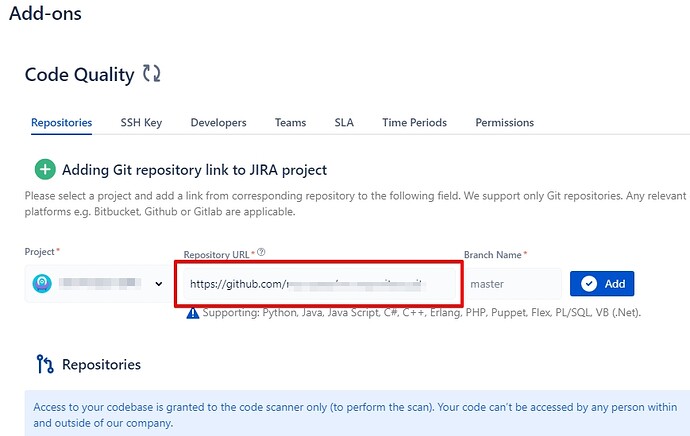
- Copy repository to scan to the “Repository URL” field.
Examples of repository URL: https://github.com/my-space/my-repository.git
git@github.com:my-space/my-repository.git
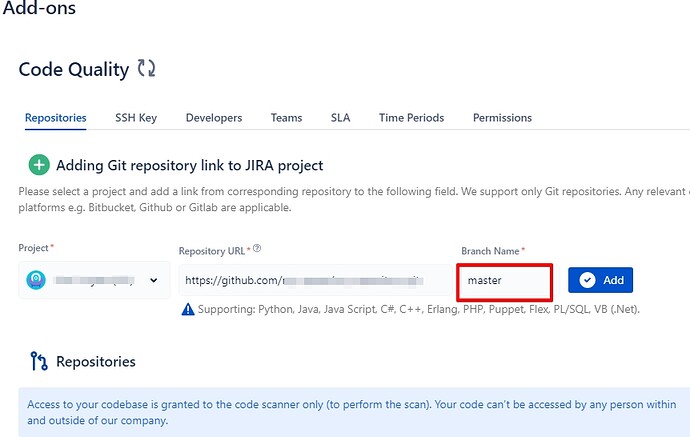
- Copy desired repository branch to the “Branch Name” field.
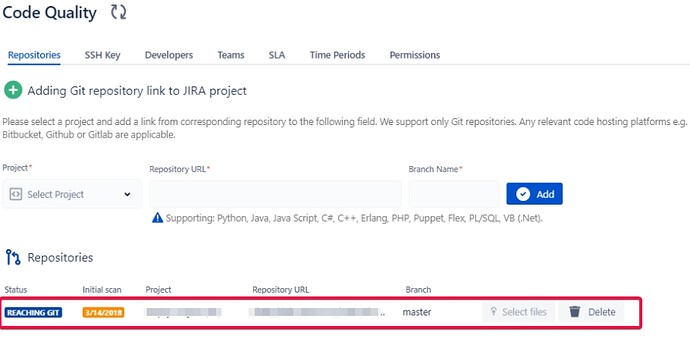
- By clicking the “Add” button added repository will appear in “Repositories” list below with “Reaching Git” status. The connection between Git repository and Jira is created.
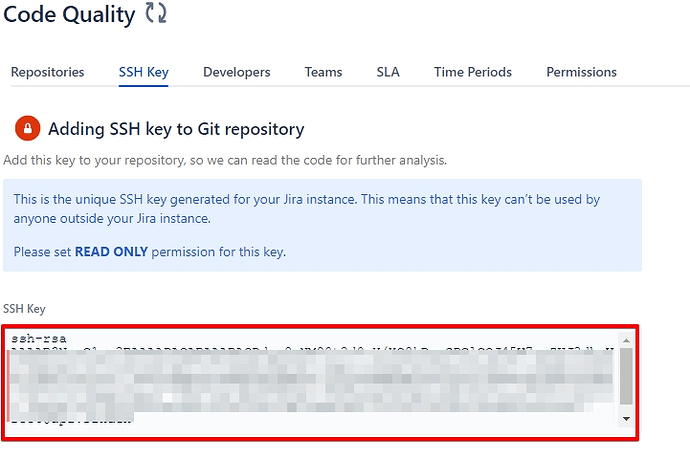
- Copy SSH key from “SSH Key” tab and add it to the Github, Gitlab, Assembla or Bitbucket repository. Adding SSH key is needed only once.
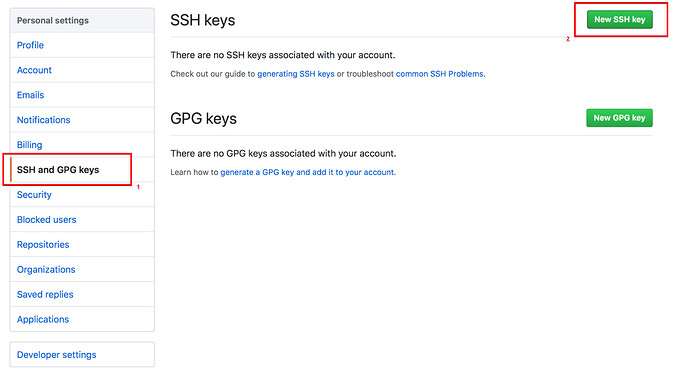
- How to add the SSH Key in the Github
- Go to the Personal settings->SSH and GPG keys page (1)
- Click the “New SSH key” button (2)
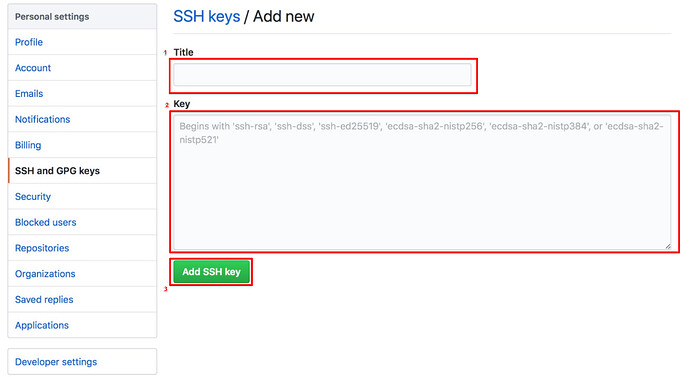
- You will be redirected to the “SSH keys / Add new” page
- Enter a title into the “Title” field (1)
- Paste SSH key into the “Key” field (2) and click the “Add SSH key” button
- That’s all, SSH key is added to your repository
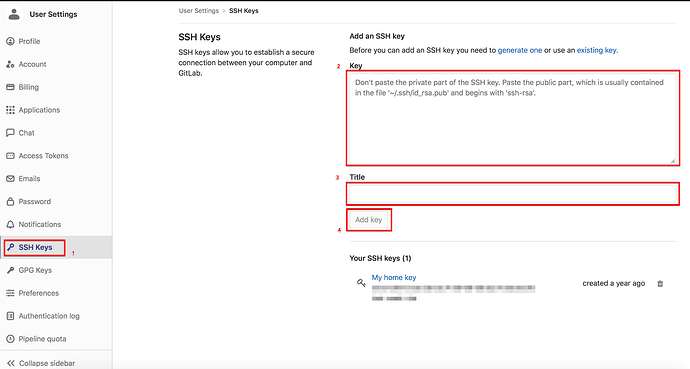
- How to add the SSH Key in the Gitlab
- Go to the User Settings → SSH Keys page (1)
- Paste SSH key into the “Key” field (2)
- Enter a title into the “Title” field (3) and click the “Add key” button (4)
- That’s all, SSH key is added to your repository
- How to add the SSH Key in the Assembla
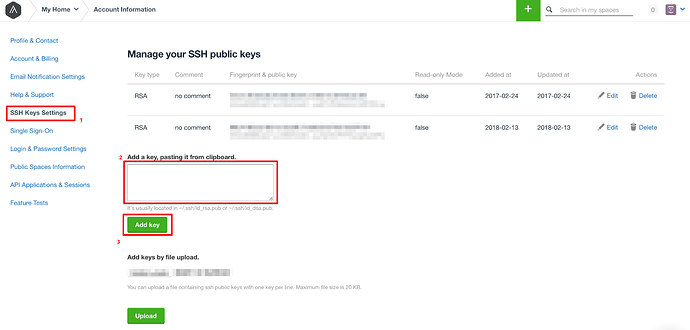
- Go to the Account Information → SSH Keys Settings (1)
- Paste SSH key into the “Add a key” field (2)
- Click the “Add key” button (3)
- That’s all, SSH key is added to your repository
- How to add the SSH Key in the Bitbucket
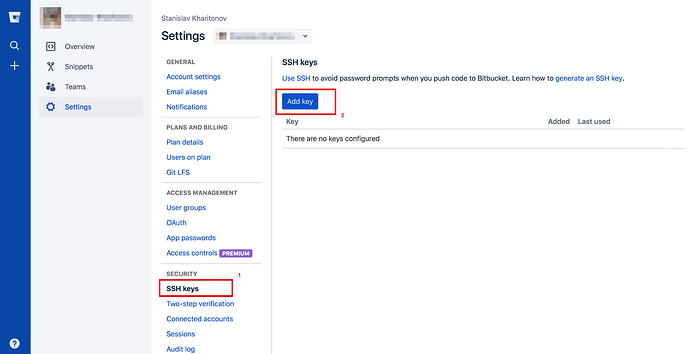
- Go to the Settings → SSH Keys page (1)
- Click the “Add key” button (2)
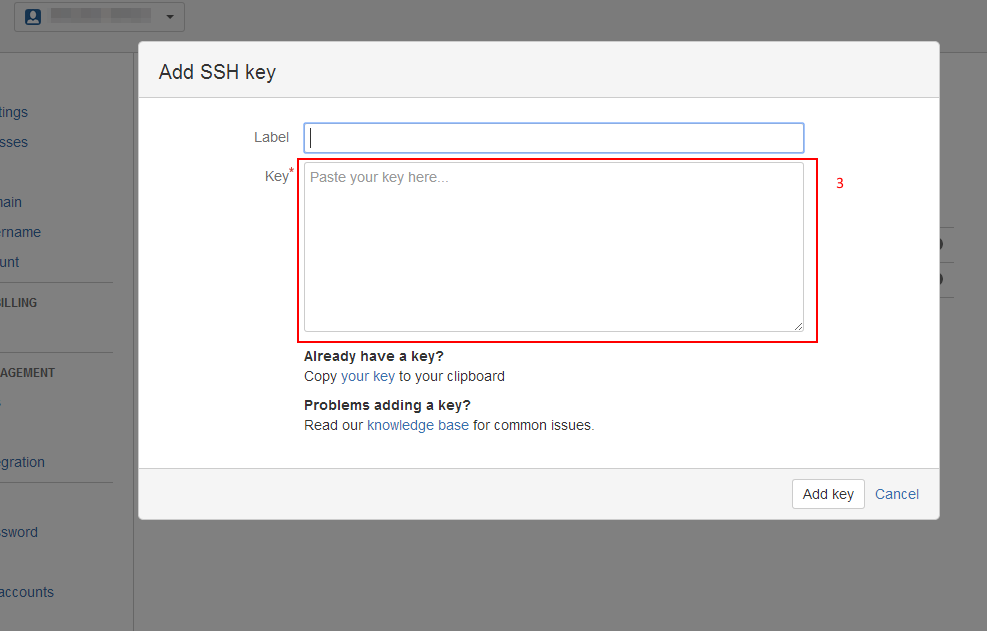
- The “Add SSH key” modal will appear
- Enter a label into the “Label” field
- Paste the SSH key into the “Key” field (3) and click the “Add key” button
- That’s all, SSH key is added to your repository
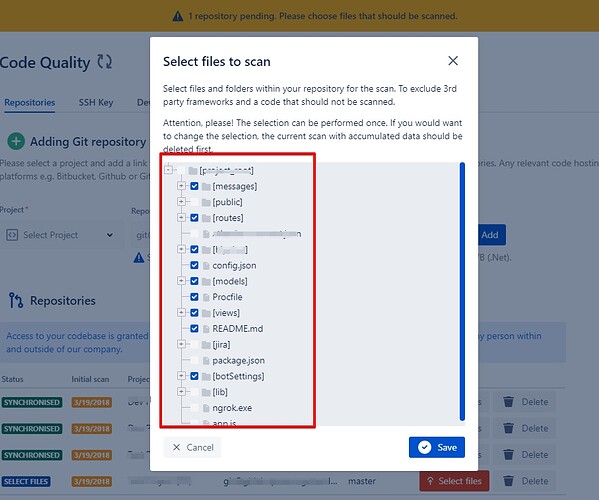
- After the SSH Key is added the repository status changes to “Select files”. Click the “Select files” button and mark checkboxes of the files which you want to scan in “Select files to scan” modal
- Scanning begins by clicking the ”Save” button.
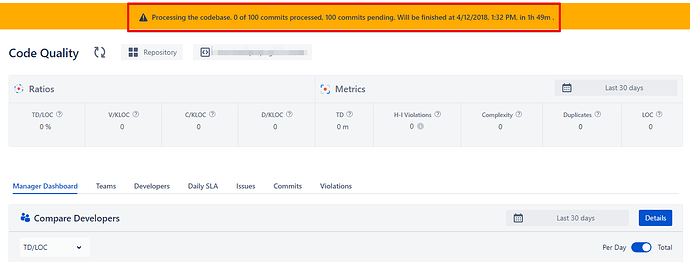
- Notification with a countdown until scanning finish appears on the add-on homepage. Repository information appears gradually as scanning progresses.
- Repositories statuses:
Reaching git - Git repository is connected to Jira project.
Select files - repository files necessary for scanning need to be chosen.
Synchronised - Git repository is connected to Jira project and is scanned.
No access - Git repository isn`t connected to Jira project for the following reasons: either repository URL or branch name is incorrect, SSH key isn’t added to Git. Repositories with “No access” status disappear in 30 seconds after such repository is added.
*The user should have administrator rights to have an access to the add-on settings.
